Rear indicators
In previous posts I've mentioned that I'd cracked the OE indicators and suffered multiple bulb failures in the soft silicone ones I'd replaced them with. My perfect indicators would be LED, E-approved, impact resistant, water and dirt-proof, low cost, easy to obtain lenses and easy to fit.
Of course, I couldn't find such an item and have had to settle for a compromise. I
bought a pair of fairing mount-D 'Yamaha' indicators from a local shop.

These are E-marked which specifies an acceptable pattern of spread and intensity. However it was clear that they have a relatively limited beam width and that it is basically to the front of the device, despite the moulded lens.
Ideally I wanted a mount point that is shielded from dirt and impacts and that didn't involve cutting the bike, but once again, I couldn't think of such a place. I chose to fit them either side of the rear light which had a suitable angle. As the plastic is curved here I carved two pieces of plastic to make mounts. I suppose you could you 'plastic metal' to mould a similar item, or if you have the facilities set-up some sort of casting process!

The first took 2 hours to make, the contra-lateral one was far quicker as I could make it as a mirror image. The picture doesn't really show the curvature required. The indicator units have a 10mm stem through which the wires enter and this seemed to be a path for the ingress of dirt and water and so I injected epoxy adhesive into the space.

The indicators were fitted with Japanese-size bullet indicators so euro ones had to be fitted after sliding on some cable sleeving. I always crimp and then solder them. The plastic covers from the resistor/extension leads supplied were reused; of course these have to be fitted first!
Then the indicators and spacers were fitted, with a smal lsmear of grey outdoor sealant between the spacer and mudguard. After rethreading the sleeve into the rear light unit and making the connections it was time for a test.
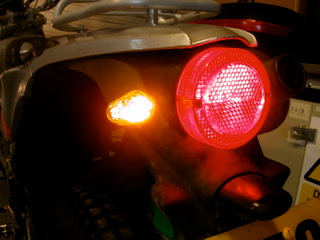
Naturally the flash rate is too fast as I've not chnaged the relay yet. The relay is an electronic one but appears to be an 'intelligent' one that has a fast flash rate to tell you if a bulb is blown.
Here's the rear view:

My only concern at this stage is that the left hand unit is a little susceptible to impacts; and the plastic is brittle. Time will tell.
posted by Adrian @ 11:45 am
![]()

0 Comments:
Post a Comment
<< Home